Mixed Berry Cheesecake
(No-Bake & Just 10 Minutes Prep Time)

Mixed berry cheesecake is a fantastic no-bake dessert recipe that brings all the flavor and color of mixed berries. This quick and easy dessert recipe can be whipped up with around 10 minutes of prep time, making it the perfect dessert recipe when you have lots to prepare in the kitchen!
Dessert Recipe | Cheesecake Recipe | Mixed Berries Recipe | Fruits and Nuts | No-Bake Recipe | Made Under 15 minutes | Easy Desserts | Christmas and Festive Desserts
Serving:
8-10 servings
Ready in:
2hr, 40 mins
Skill level:
Very easy
Serve with:
Good on its own
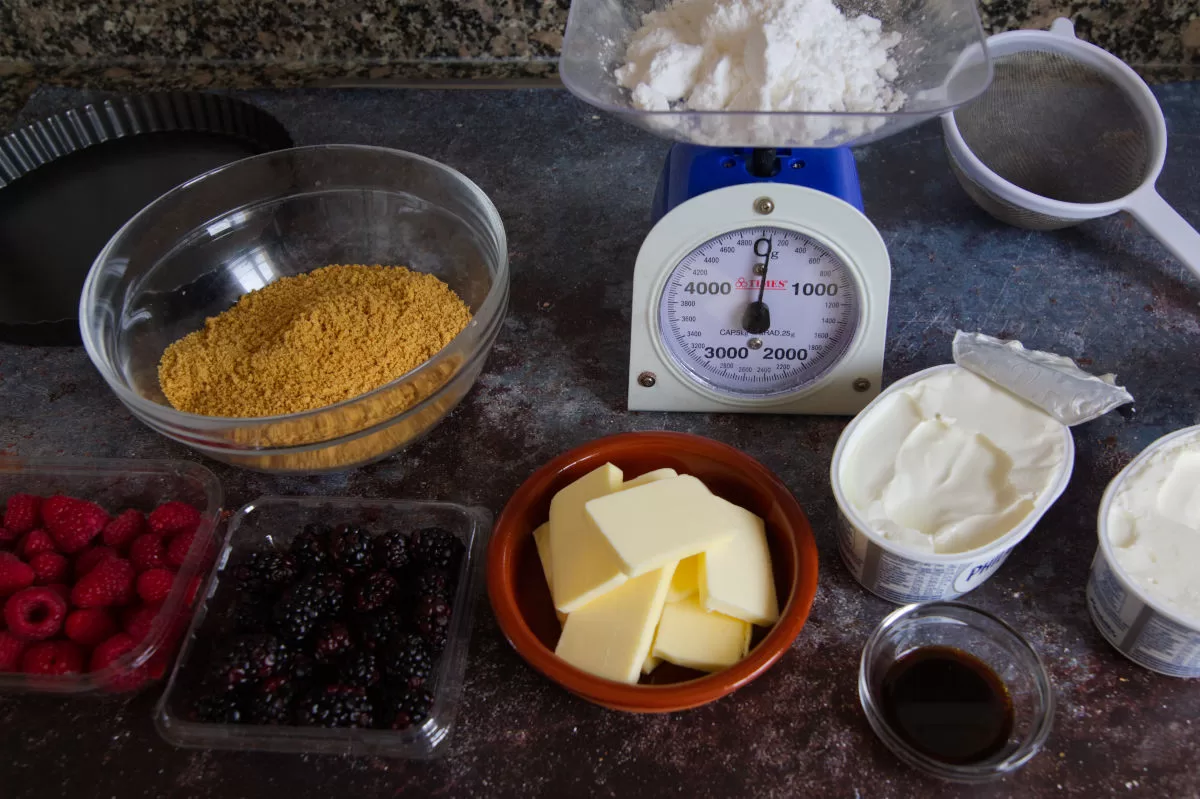
Ingredients you’ll need
Biscuit Base
- 5 oz. (150 g) unsalted butter (melted)
- 10 oz. (300 g) of Graham cracker biscuits (or digestive biscuits work great too)
Cheesecake Filling
- 14 oz. (400 g) of cream cheese (Philadelphia cream cheese or similar)
- 3.4 oz. (100 ml) of double cream
- ½ teaspoon of vanilla essence
- 3 oz. (75 g) of confectioners/icing sugar
Cheesecake topping
- 3 oz. (75 g) of fresh raspberries
- 3 oz. (75 g) of fresh blackberries
- 2 tablespoons of crushed pistachio nuts
Equipment needed
- Fridge
- A tart pan with a removable base or spring-form cake tin with removable bottom
- A large mixing bowl
- A large spoon or spatula
- Food-processor or mortar and pestle (for making the base)
Watch step-by-step recipe video
If you’re looking for this recipe’s video and many other great recipe ideas, why not check out our Spanish Radish YouTube Channel? We’ve got everything from quick and easy tapas recipes, delicious main meals, and incredible Spanish dessert options too.
Quick and easy no-bake cheesecake
One of the best things about this recipe (apart from the taste!) is how easy this recipe is to make. All you need is a springform cake tin and a large mixing bowl, and you’re good to go. If you want to make this recipe even easier, then a food processor helps to crumble the cookies for the base.
Keep reading to discover how to make this easy cheesecake recipe in around 10 minutes.
Why you’ll love this recipe
- Quick and easy
- Looks incredible
- 10 minutes prep time
- Full flavored, utterly smooth creamy goodness
- Fresh berries for some beautiful color and plating options
- Perfect festive dessert recipe
- No baking
Baked and no-bake Cheesecake – What’s the difference?
No-bake cheesecakes tend to be softer and more fluffy in texture. They’re utterly smooth and very decadent. Both types of cheesecake will be very creamy, but baked cheesecakes rely on heavy (double) cream and sour cream, whereas no-bake cheesecakes use cream cheese.
For a no-bake cheesecake to set, it’ll need to refrigerate for at least a few hours before serving. Once served at room temp, it’ll only hold out for an hour or so before it starts to melt and become very gooey.
Baked cheesecakes are denser and have a slightly firmer texture which is achieved by baking the ingredients, with or without a water bath. Baked cheesecakes also tend to be served without a topping.
Whichever cheesecake type you prefer, no-bake cheesecakes are hands down far easier to make and taste incredible.
Here’s our baked cheesecake recipe with honey and orange.

Fresh or Frozen berries?
Fresh berries
We used 150 grams (7oz.) of fresh berries for this recipe and opted for a mixture of raspberries and blackberries as they are in season (winter). Of course, this recipe can be made with any berries (or fruit) or even with melted white chocolate and pistachios (you can check our white chocolate cheesecake recipe here).
Fresh berry (and fruit) suggestions:
- Strawberries
- Cranberries
- Blackberries
- Kiwi fruit
- Paw paw or papaya
- Pineapple
- Stewed apple
- Orange or mandarin
Fresh berries look great and have a fantastic flavor that can’t be matched by frozen berries. But given the price of fresh berries, frozen berries can also be a great option. The advantage of frozen berries is the convenience of having them any time of the year.
Frozen berries
When using frozen berries for your topping, give them plenty of time to thaw (at least an hour).
When adding them as the topping to your cheesecake, it’s likely there will be plenty of juice from the thawed berries and this can either be drained off or drizzled over the cheesecake. Both will taste great and will give you a different style visually compared to using fresh berries as we have for this recipe.
Best biscuits to use for cheesecake crusts
The classic ‘go-to’ biscuit crust for any cheesecake recipe usually is made with Graham’s Crackers. The famous cracker is available in honey or cinnamon flavors and the crust base recipe has been around forever in the US and is simply made with Graham’s Crackers, butter, and a pinch of salt.
Alternatives to the Graham Cracker are Digestive Biscuits that are found throughout the UK, Europe, and Down Under in Australia and NZ. These wholesome biscuits are a favorite that are often served as afternoon tea, but they also work a treat for making cheesecake crusts!

Tart pans, Springform cake tins, Silicone cake molds – What’s best to use for cheesecakes?
Nowadays there are plenty of options for molds for your cheesecake. Let’s take a look at what we use here at Spanish Radish HQ:
Tart pan with removable base
For ease and convenience, we find using a tart pan with a removable base the best for our cheesecake-making adventures. Also known as ‘quiche pans’ these types of molds have a removable bottom and a crinkled edge that gives pies, tarts, and cheesecakes a distinctive edge style.
Tart pans are available in a wide range of sizes, ranging from 6 inches (15cm) all the way up to 12-14 inches (30-35cm). Most tart pans will have an edge depth of around 1-2 inches (2.5-5 cm).
Springform cake pan
These are also great options for making cheesecakes, especially when you want a deeper cheesecake. As the name suggests, these cake pans have a removable base that unclips from the sides.
The sides have a sprung clip that releases and increases in diameter, allowing you to easily slide out any cake or cheesecake.
Springform cake pans are available in a variety of sizes ranging from 6 inches (15cm) all the way up to 12-14 inches (30-35cm). The sides also vary and range from 2 inches (5cm) up to 5 inches (12.7cm).
We used a 10-inch (25cm) spring form cake tin when we made our White chocolate cheesecake recipe, check the link and recipe card to see the tin and how it turned out.
Silicone cake molds
If you’ve spent any time around the kitchen section of department stores, you’ll have noticed the abundance of brightly colored molds appearing on shelves. Silicone molds are all the rage and there are plenty of advantages to using them.
Silicone molds come in a huge range of sizes, shapes, colors, and offer an unlimited range of designs that can really transform your baking game. They’re flexible, can tolerate extreme heat and cold, and are super easy to use.
So are silicone molds good for making no-bake cheesecakes?
Actually, no!
As no-bake cheesecakes have a soft base and gooey, silky smooth center, it is almost impossible to remove the silicone mold without destroying the base, or the entire cheesecake for that matter. We suggest using one of the pan types mentioned above, or even a glass for individual portions.
Glass Cheesecake molds
As there’s no baking involved, another great option for serving is a glass or jar. Carefully pack in the biscuit base, then lovingly drizzle in the filling, top with berries, and pop them in the fridge for a few hours to set.
Using small glasses is a great way to serve up cute lil’ individual mini cheesecakes, or perfect for controlling portion size (we all know the slice game!). Here’s our Avocado and Lime Cheesecake recipe where we used glasses for serving, and we loved the effect.

How to make this no-bake cheesecake with mixed berries
As promised, this cheesecake recipe comes together with minimal fuss and no special equipment. Best of all, it’s made in around 10 minutes.
There are just 4 simple steps to follow (more info on each step plus a step-by-step recipe video in the recipe card below).
Step 1 – Prepare the Base
Step 2 – Make cheesecake filling
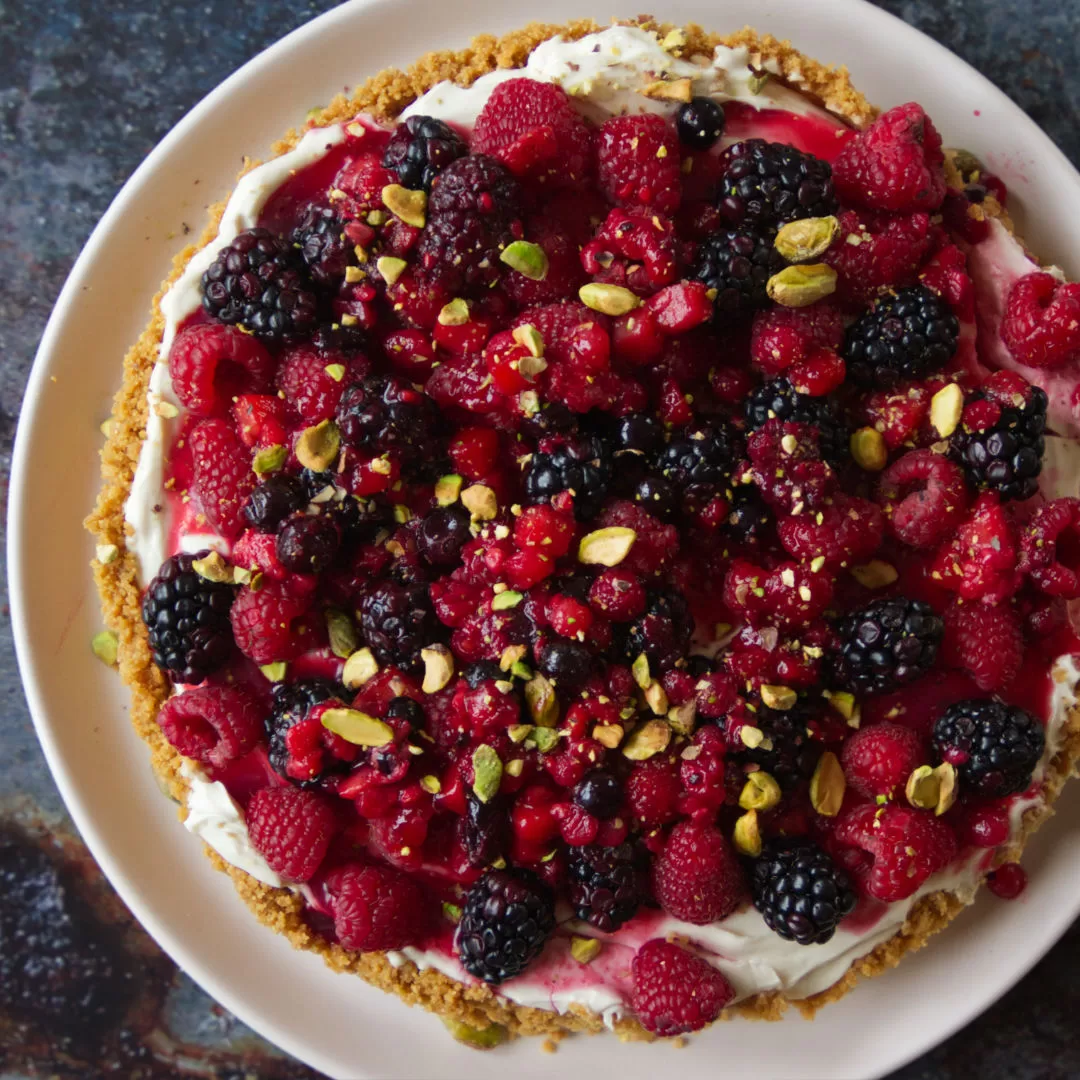
Step 3 – Decorate the cheesecake with mixed berries.
Step 4 – Refrigerate cheesecake & Serve
More Cheesecake Recipes
No bake cheesecake with avocado and lime
Vegetarian, 15-minute recipe

Mixed Berry Cheesecake (No-Bake - 10 min prep time)
Equipment
- Fridge
- A tart pan with a removable base or spring-form cake tin with removable bottom
- A large mixing bowl
- A large spoon or spatula
- Food-processor or mortar and pestle (for making the base)
Ingredients
- Biscuit Base
- 5 oz. 150 g unsalted butter (melted)
- 10 oz. 300 g of Graham cracker biscuits (or digestive biscuits work great too)
- Cheesecake Filling
- 14 oz. 400 g of cream cheese (Philadelphia cream cheese or similar)
- 3.4 oz. 100 ml of double cream
- ½ teaspoon of vanilla essence
- 3 oz. 75 g of confectioners/icing sugar
- Cheesecake topping
- 3 oz. 75 g of fresh raspberries
- 3 oz. 75 g of fresh blackberries
- 2 tablespoons of crushed pistachio nuts
Instructions
Step 1 - Prepare the Base
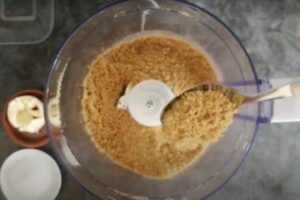
- Add the biscuits to a food processor and buzz for around 30 seconds.10 oz. 300 g of Graham cracker biscuits (or digestive biscuits work great too), Biscuit Base
- Melt the butter in the microwave and add to the biscuits with a pinch of salt and buzz for another 30 seconds.5 oz. 150 g unsalted butter (melted)
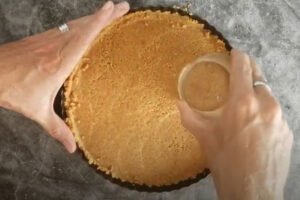
- Spoon the biscuit mix into your cake tin (if you’re using a metal tin, don’t forget to grease the tin before use). Use a flat-bottomed glass or jar to press down the mixture into an even layer.
- Refrigerate until required in the next step.
Step 2 - Make Cheesecake Filling
- In a large mixing bowl, add the cream cheese and confectioners (icing) sugar and mix by hand until smooth. It should take around a minute. (Note: Do not use a food processor for this step).Cheesecake Filling, 14 oz. 400 g of cream cheese (Philadelphia cream cheese or similar), 3 oz. 75 g of confectioners/icing sugar
- Add the vanilla essence and double cream, and continue to mix until you see soft peaks. It should take around 2-3 minutes.3.4 oz. 100 ml of double cream, ½ teaspoon of vanilla essence
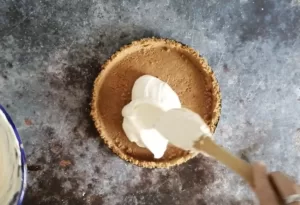
- Take your prepared cheesecake base from the fridge and add the cheesecake filling with a large spoon or spatula. No need to smooth the topping perfectly as we will be adding berries as the topping.
Step 3 - Decorate the cheesecake with mixed berries
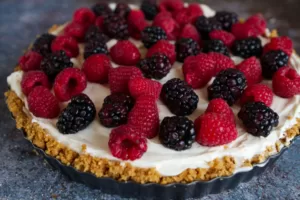
- Give your fresh berries a rinse first. Be careful not to bruise or damage the berries (they bruise easily). Allow to dry and place fresh berries onto your cheesecake. Sprinkle with some crushed pistachio nuts.Cheesecake topping, 3 oz. 75 g of fresh raspberries, 3 oz. 75 g of fresh blackberries, 2 tablespoons of crushed pistachio nuts
Step 4 - Refrigerate cheesecake
- Carefully cover your cheesecake and refrigerate for at least 2 hours (6 hours or overnight is even better). This will allow the filling to harden and will make serving slices easier.
- To serve, cut slices with a sharp warm knife and serve using a cake slice.
Video
Cooking Tips and FAQs
How long does this cheesecake recipe take to make?
- Prep time: 10 minutes
- Cook time: None
- Refrigerate: 2 hours, 30 mins (minimum)
- Total time: 2 hours, 40 minutes.
How long does a no-bake cheesecake take to set?
Refrigerate for at least 2 hours. Best results after 6 hours (or overnight).
How long does no-bake cheesecake last?
Store in the fridge in an airtight container for a maximum of 2 days. The fresh berries will not last much longer than 2 days, frozen berries may last slightly longer.
Does this cheesecake recipe contain dairy?
Yes, cream cheese is the main ingredient in the cheesecake filling. Butter is also used in the cheesecake crust.
Can no-bake cheesecake be frozen?
No-bake cheesecake freezes really well and will last up to 3 months when frozen. Just leave the toppings off if you’re planning to freeze your cheesecake.
Can you put cheesecake in the freezer to set quicker?
Yes, be sure to lay your cheesecake flat in the freezer and it should be firm within 30 minutes. Freezing the base is also a good way to save some time when making the cheesecake.
Our Blog
3 Seasonal Fruit Desserts to Make in February
Discover 3 Seasonal Dessert recipes to make for February
What is the Mediterranean Diet and How to Follow It
What is the Mediterranean Diet and How to Follow ItThe Mediterranean diet isn’t a trend, a detox, or a strict set of rules. It’s a way of eating — and living — rooted in the traditional food cultures of countries like Spain, Italy, Greece, and...
February on a Plate: Seasonal Fruit and Veg in Spain & the Mediterranean
February on a Plate: Seasonal Fruit and Veg in Spain & the MediterraneanDiscover what fruit and veg are in season in February in Spain and the Mediterranean. February may be short, but it’s quietly brilliant when it comes to seasonal produce....









So festive and colorful!
Perfect for the frestive season! All the best and happy cooking!
Can frozen berries be used for this recipe?
Yes, frozen berries can be used, although you’ll need to thaw them and remove any excess liquid. This can be tricky so we suggest using fresh berries for the best flavor and visual appeal. Hope that helps! All the best, happy cooking!